How to build a greenhouse for growing cannabis

Ever wanted to build your own cannabis greenhouse? Few things are more satisfying than growing weed in the comfort of your own backyard. But to ensure top results, a homemade greenhouse really fits the bill. Allow us to provide you with a useful step-by-step guide.
Contents:
Wouldn’t it be nifty to have your very own cannabis greenhouse? Yes, your very own magic herb garden, right in your backyard.
A greenhouse does more than just provide shelter for your beloved cannabis plants. It’s also a sanctuary that supplies them with adequate lighting and nutrients. And if you’re trying to keep operations under wraps, a greenhouse can be mighty helpful in doing so.
Now, at this point, you probably have some questions. Why should you grow cannabis in a greenhouse? Is it even possible to build a greenhouse from scratch? What materials will you need? Is it an expensive project to get into?
Dear reader, we’ll address all of these important points in this article. We’ll also cover essential information on running a marijuana greenhouse, including which grow lights to use, how to optimise airflow, and the best way to water your plants. Finally, we'll break down the basics of building your very own DIY marijuana greenhouse for all you beginner greenhouse growers out there!
Why Should You Build a Greenhouse for Growing Cannabis?

We briefly mentioned the general benefits of building a marijuana greenhouse; now let’s get a little more into the specifics.
A greenhouse is essentially a controlled environment that allows you to manipulate certain elements to support plant growth and development. More specifically, greenhouse growers can control humidity, hydration and feeding, temperature and light, while also harnessing natural sunlight.
As for providing shelter, a greenhouse can protect your cannabis plants from the harsh elements, eliminating any worries during episodes of droughts or storms. Growing cannabis in a greenhouse also wards off potential predators like scavenger animals from preying on your beloved plants.
Building a Marijuana Greenhouse: Important Considerations

Building a greenhouse requires a lot of careful planning, and there are numerous factors to consider before diving into this project headfirst.
If you’re in the process of building your own marijuana greenhouse, or at least interested in the prospect of growing cannabis in a greenhouse, here are some of the aspects you should consider.
Design
Greenhouses come in one of three basic structures: lean-to, gable, or polytunnel. The latter one follows a curved shape and is made from basic metal frames and plastic covers. The former two have triangular roofs and can feature a fibreglass or metal frame, with glass panes or polycarbonate panels.
There are also four different types of greenhouses. The most affordable are small, pop-up greenhouses. These are more for hobbyists limited to small spaces, and are made from a basic metal frame with a plastic cover and some shelves to hold up plants. The entrance/exit is a zip-up door.
The second type is a walk-in greenhouse. These are similar to the pop-ups in terms of structure, but they are roomier. If you have a bigger backyard but are on a tight budget, this option is for you.
The third type is polytunnel greenhouses. These tunnel-shaped greenhouses offer much more space, which makes them a top choice among commercial growers. This type of greenhouse is a huge step up in price compared to walk-ins—about four times more expensive—but you get what you pay for.
Finally, we have professional outdoor greenhouses. These are made with sturdier aluminium frames and polycarbonate panels. Not only are they extra durable, but they offer efficient light transmission and more protection from natural elements. This is the most expensive type, being around five times pricier than polytunnel greenhouses.
As a beginner cannabis grower, you’ll do fine with a basic pop-up style greenhouse. Especially if you’re just growing for personal consumption or to share with a few friends, this is a sensible choice in terms of structure, effort, and price.
Location
Location is a key element in building a greenhouse. Ideally, you’ll want to place it in a spot where your plants receive around 10–12 hours of direct sunlight each day.
With that in mind, it’s best to build a greenhouse facing the direction of the sunrise. Make sure it’s not blocked by any tall trees or buildings.
At the same time, space will be an important factor. You’ll want to be able to move around comfortably while keeping your plants a decent distance from one another, about 15–30cm apart.
Airflow and Watering
Every experienced cannabis grower knows that fresh air and proper humidity are essential to healthy development. Cannabis plants prefer different humidity levels depending on the stage of growth; around 60–70% during veg, and never more than 50% during flowering. Although going too low may stall growth, high levels of humidity inside your greenhouse could spell disaster via mould development.
A thermometer and hygrometer should give you a more accurate reading of both temperature and humidity. They’re affordable, and definitely a worthy investment when growing in a greenhouse.
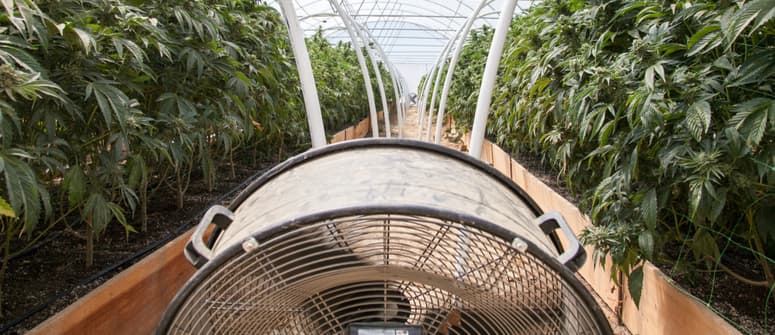
But as for ensuring fresh air circulation and ventilation, this is where some oscillating fans come in. And here’s a rule of thumb: your intake and exhaust fans should have a higher CFM rating than the cubic feet of your greenhouse.
As for fan placement, you’ll want them both above and beneath your canopy. This prevents old, hot air from being trapped, which may cause a rise in temperature and humidity levels.
For watering, an automated system like drip irrigation is your best bet. It ensures proper water distribution, which prevents overwatering and subsequent bacterial and mould growth, and at the same time prevents water wastage, which Mother Nature will be grateful for.
Grow Lights
If you are able to build your greenhouse in a spot where your marijuana plants can get adequate natural sunlight every day, that’s all well and good. But if you live in a place where there isn’t much sun, artificial lighting is your next port of call. Even if your greenhouse is in a sunny spot, artificial lighting allows you to really optimise growth.
If you're new to greenhouse growing, a Google search of grow lights will lead you to a bad case of option paralysis. But by default, LED panels are always a good jumping-off point. And as long as your plants are getting 400W/m², you can expect healthy and robust yields.
What’s great about artificial lighting is that you have full control over the amount of daily light your plants receive. So, let’s say you’re growing during the winter when there are fewer hours of sunlight, your plants can still get the necessary 12 hours during bloom (or up to 20 hours during vegetation) and development won't be hampered.
Light Deprivation Coverings
Just like adding artificial lighting, you can also manipulate a plant’s flowering cycle through light deprivation. By exposing plants to 12 hours of darkness, you can initiate the flowering process in photoperiod plants.
There are several simple ways to perform light deprivation, such as installing blinds on the walls of your greenhouse. As for the roof, a removable tarp is useful to reduce the amount of sunlight that seeps through. This is also the most affordable option if you’re operating in a smaller greenhouse.
Then there’s the option of automatic shutters you can control with the touch of a button. It may cost you a bit, but if you have the resources, it is a good investment to make.
How To Build a Marijuana Greenhouse

Now that you’re armed with more knowledge about maintaining a marijuana greenhouse, you’re ready to build your very own!
To keep it beginner-friendly, this step-by-step guide will detail how to build the least-complex version of a marijuana greenhouse. For this reason, we will use polyethylene plastic sheeting as the main material, instead of sturdier glass.
First, we’ll go through the essential materials, all of which you can find in your friendly neighbourhood hardware store.
Materials for Building a Marijuana Greenhouse
What we’ll cover are the materials to erect the greenhouse’s main structure. All the other essentials we’ve covered in previous sections won’t be included here:
- 6m PVC pipes: These will serve as the main skeleton of your greenhouse. You’ll want a material like PVC to provide a solid-enough frame.
- 4m PVC pipes: These shorter pipes will serve as stringers for a more solid frame.
- Polyethylene plastic sheeting: The main material to cover the structure. Polyethylene works well in colder climates, so if you live somewhere hotter, shade netting is the alternative.
- 4 × 4cm timber: To provide extra support for the overall structure.
- Rebars: To provide a solid foundation for your greenhouse’s structure. You’ll want these to be about 60cm in length.
- Staple gun and duct tape: To secure the sheeting.
- Wooden boards: Either for building a raised bed or to form your baseboard.
Building a Marijuana Greenhouse: Step-by-Step Guide
Our step-by-step guide should effectively walk you through the very doable process of building your own weed greenhouse. This will be the standard polytunnel design, which should more than accommodate your mission.
Step 1: Find the Perfect Spot for Your Greenhouse
Ideally, you’ll want to work on level land that’s slightly bigger than the final polytunnel. Also, your greenhouse should be facing south, preferably without potential obstructions from trees or nearby buildings. This allows for optimal sunlight exposure.
Another important factor when choosing the right spot is good drainage. To know for sure, dig a hole in the soil around 30cm wide and 45cm deep, then fill it with water.
Once it’s completely drained, refill it with water, but this time take note of how long it takes the water to drain. You know you have good soil drainage if you see the water level drop an inch per hour.
Step 2: Build the Base
Before doing so, decide on whether or not you’ll use a raised bed as your foundation. If you want fewer worries about pests and frozen ground during the winter, this is the way to go.
If you’re choosing to go without raised beds, you can simply anchor your greenhouse base into the dirt. For this option, the wooden boards can also act as the foundation for the greenhouse’s main frame.
Now, if you are going with the raised bed option, get to building its frame with the wooden boards. Keep it perfectly squared up to provide good support for the greenhouse.
Step 3: Solidify the Foundation
Using a mallet, pound the rebars into the ground. You know you’ve found the right depth when at least the upper half (about 30cm) of the rebar protrudes from the ground.
Place these rebars in each of the four corners, as well as in the middle of the side walls. They should be positioned about a metre away from each other, but for a larger greenhouse, you can extend that distance to two metres.
Step 4: Build Your Primary Frame
If you’re going with the polytunnel design, you can use the PVC pipes as they are, without cutting them. Simply take one end of the 6m pipe and place it over one of the rebars.
Next, bend it into an arch, take the other end, and place it onto the rebar on the opposite side. Do this for all the other pipes and rebars.
To add to the stability of your polytunnel, connect the 4m PVC pipes to each of the arches at the topmost point to form a kind of spine. Next, form a stringer on one of the side walls by horizontally attaching another 4m PVC pipe. Be sure it’s about two metres from the ground. Repeat this process on the other sidewall. You'll need some duct tape or zip ties to attach these shorter pipes.
To beef up the sturdiness of the framework, consider adding wooden frames next to the spine and stringers you just installed. You can also use these frames to build your doorway.
Step 5: Attach the Plastic
For this, you’ll need an extra hand or two. Begin by applying some duct tape on the areas where the plastic sheeting attaches to the PVC pipes.
Next, drape the sheeting onto the structure and let it flow over like a tent. Secure the sides by sticking the plastic onto the areas where you applied the duct tape.
Be sure you’ve stretched the plastic enough for it to tighten and not be filled with air. After you’ve achieved your desired coverage, staple the bottom of the polyethylene onto the baseboards.
And you’re done. You can take a few moments to marvel at your handiwork. You’ve officially built your very first greenhouse from scratch. Be proud of yourself. Have a cold beverage as a refresher, and pat yourself on the back.
Setting Up a Cannabis Greenhouse: DIY!

Nothing compares to the satisfaction of successfully creating something from scratch. Building a cannabis greenhouse does require some effort, but if you already have the tools at hand, you can complete this project within a few hours.
The best part: you now have a home for your beloved cannabis plants, where they can thrive and blossom into robust specimens.
Remember, building a greenhouse doesn’t have to be a difficult endeavour, especially if you have this step-by-step guide by your side. And once it's all set up, you'll be able to benefit from the perks of both indoor and outdoor cannabis growing. Now go ahead and get to building!
.jpg)
.jpg)

.jpg)
