How to germinate cannabis seeds

Germination is a vital stage of the growing process where life begins. Use these tips to ensure a successful start to your grow.
Germination is where it all begins. This vital stage of the grow cycle doesn’t receive anywhere near as much attention as the longer vegetative and flowering phases, but it’s just as important, if not more so! After all, if germination fails, then your potential harvest will never make it past step one. Some growers might think germination is as simple as tossing a few seeds into a growing medium and waiting several days. While in some cases this can work, there are numerous methods and approaches that can be utilized to increase the likelihood of successful germination.
When it comes to germination, many growers often fail to consider every piece of the puzzle. Most growers manage to provide water and darkness, but natural soil is one big, living organism filled with beneficial bacteria that assist in the process. This is what sets the Royal Queen Seeds Starters Kit apart from other germination methods (more on this below).
WHAT IS GERMINATION, EXACTLY?
But first, before we delve into these methods, let’s take a brief look at the biology of germination to better understand the process. Every seed is effectively a small package of genetic material that is the product of plant reproduction. These small vessels are designed to be dispersed by various means, such as wind and animal ingestion/excretion. If lucky, a seed will be transported to an environment that triggers the process of germination. Such vital environmental factors include temperature, water, and how deep seeds become buried in the soil. Of course, these factors can be simulated and optimized by modern growers to maximize the chances of germination.
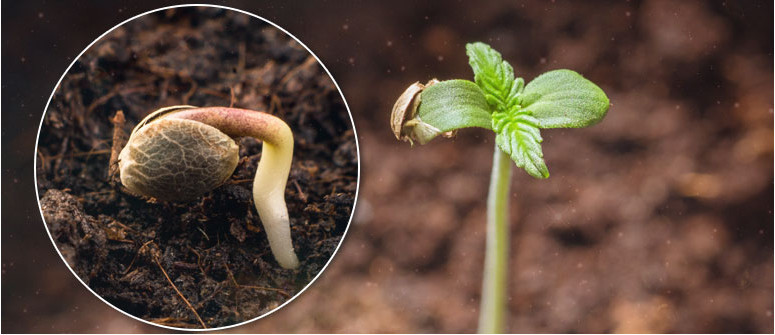
When subject to these ideal settings, water exposure catalyzes enzymatic processes within the seed that initiates growth. Beneficial bacteria within the soil also encourage germination, plant growth, and photosynthesis. First, a taproot emerges from the shell of the seed and begins to descend into the soil in search of water. Shortly afterwards, a shoot emerges from the seed and heads in the opposite direction, above the soil, to begin photosynthesizing.
SEED VIABILITY IS CRUCIAL
So, if germination can occur this easily in nature, it must be simple to do indoors, right? Absolutely—but only as long as you recreate ideal conditions. But even if conditions are perfect, if a seed isn't viable, it won't germinate. Before attempting to germinate seeds, it’s advised to conduct several easy tests to determine seed viability so you don’t waste time and energy. Check out procedures such as physical examination and the float test here. With healthy and viable seeds, germination should begin within a matter of 12–36 hours.
DESIGN THE IDEAL ENVIRONMENT
One more thing to get sorted before germinating your seeds, and thus birthing your plants into the world, is the environment they are soon to be subject to. Aim to keep the area at 22–25°C with a relative humidity of 70–90%. This climate can be easily maintained using a grow tent or propagation chamber. You can use humidifiers to maintain high humidity and a heater or fan to bring temperatures up or down. Use a hygrometer to get constant readings of temperature and humidity.
HOW TO GERMINATE CANNABIS SEEDS
Now that we’ve covered how to identify viable seeds and how to create the ideal environment, it’s time to germinate our seeds. There are several methods growers can choose from, each of which is as good as the other—if done correctly.
SOW SEEDS DIRECTLY INTO THE FINAL GROWING MEDIUM

One means of germinating seeds is to sow them directly into your growing medium of choice, whether that be a large pot or straight into a garden bed. Cannabis seeds are equipped to do this—after all, it’s how they’ve managed to survive in nature. The benefit of germinating right in the final container is that you avoid the stress that comes along with transplanting seedlings into gradually bigger pots, a process that can potentially slow down growth and damage roots.
The downside of sowing seeds directly into the final growing medium is that you run the risk of overwatering and overfeeding in the early stages of life. This can saturate the soil and make it hard for the small roots to penetrate deeper and become fully established. Moreover, it can lead to stunted growth and root rot.
If you do choose to utilize this method, you will need to create a hole in the soil around 1cm in depth. Drop your seed inside and cover it with soil; water just around that area, being mindful not to overwater.
USE A PAPER TOWEL TO GET THINGS STARTED

Using a paper towel is a humble yet highly effective method of germinating seeds. Gardeners use this method to successfully germinate seeds of nearly all plant species. To carry out the paper towel method, you’ll need some unbleached paper towels, clean water, two dining plates, a misting bottle, and a warm and dark place to store your seeds.
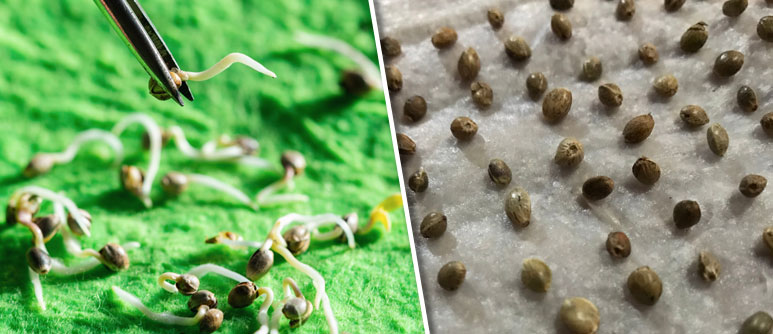
Place three paper towels onto one of the plates and lightly mist them. Place your seeds onto the moistened paper towels, leaving with adequate space between them. This is to avoid the new roots from becoming tangled. Add another layer of three paper towels on top and mist in the same manner as before. Place the other plate on top to serve as a lid that will trap moisture and maintain humidity.
Move this makeshift germination chamber to a warm and dark place. A cupboard near a heating source will work great. Alternatively, you could position a heating mat under the bottom plate to provide an ideal climate.
The speed of germination will depend on the strain you've decided to cultivate. Some strains will begin to develop a root within 24 hours, whereas others will take a few days. Check on your seeds the next day to see their progress, and that the towels are still nice and damp. Once you begin to see the outline of taproots in the paper towel, it’s time to transplant the germinated seed into a pot. Make a hole around 1cm deep in the growing medium and place your seed inside with the root pointing down. Lightly water the soil and wait for the green shoot to emerge.
START YOUR SEEDS IN A GLASS OF WATER
Starting your seeds in a glass of water is another cheap and easy method, although some growers report a poor success rate. By starting your seeds this way, you’ll also be testing their viability at the same time. Place them in a glass of lukewarm water and store in a warm and dark place overnight. When placing your seeds in the glass, you may notice that some of them float, whilst others may sink.
You should notice taproots starting to emerge within 24 hours. It’s not recommended to keep seeds in water past this point as they may drown, but it doesn’t mean the seeds are less viable.
JIFFY POTS AND GROWING PLUGS ARE A STANDARD OPTION
Jiffy pots and grow plugs are a great way to germinate seeds. These products are small chunks of growing medium that provide an ideal environment for seed germination and can be used almost immediately. They often come packaged in a tray that allows growers to save space and keep all of their germinated seeds nicely organized. Grow plugs come pre-moistened and only require the grower to drop seeds inside the ready-made holes. Jiffy pots are crafted using dried peat and need to be hydrated before use.
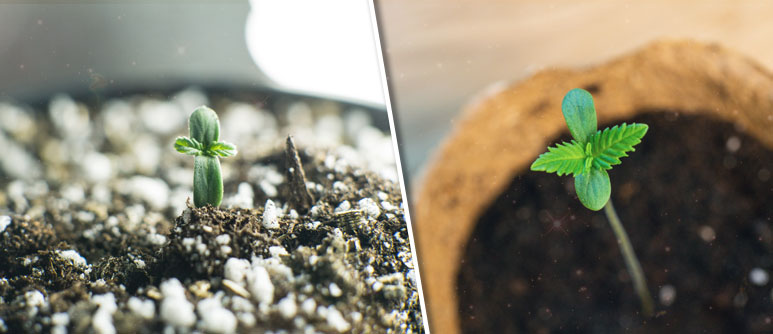
To use grow plugs or Jiffy pots, simply place your seeds in the holes on top and help them in using a wooden skewer. Cover the trays and place them in a warm environment or on top of a heating mat. One huge benefit of these methods is that the plugs/pots can be planted directly into a bigger container or into the ground. This helps keep the roots intact and reduces plant stress.
ROCKWOOL CUBES ARE AN OPTION, BUT NOT ADVISED
Rockwool cubes work in a similar fashion to Jiffy pots and grow plugs. They come in cuboid segments within growing trays, providing a dark and wet environment for seeds during germination. However, Rockwool isn’t the most environmentally friendly option as it’s the product of mining and extreme heating. It certainly doesn’t have much of a place in an organic cultivator's grow room.
RQS STARTERS KIT IS EASY AND BOOSTS SUCCESS RATE
Whether you are a novice to the growing game or a veteran of many years, starter kits ensure a much higher success rate and provide everything you need to get going! The Royal Queen Seeds Starters Kit has been designed to provide everything a cannabis seed needs to initiate and survive germination.
The kit includes a tray of Easy Start seedling pots and a packet of Bacto, which provides a mix of beneficial bacteria that enhance seedling growth and vitality. Introducing vital biodiversity into the germination process sets this method apart from others such as Jiffy pots and grow plugs, and gives seedlings a head-start in life. The kit also includes Propagator Pro, a container specifically designed to create a high-humidity environment perfect for germinating seeds. Buyers will also receive perlite, lighting, and 3 RQS Critical seeds to get them started.
HOW TO USE RQS STARTERS KIT
1. To begin the process, mix the contents of the Bacto packet with 1 liter of lukewarm water. Once dissolved, place the tray of Easy Start pots in the water to allow the bacteria to colonize the substrate.
2. Next, place a layer of perlite on the bottom of the Propagator Pro. Perlite is a form of volcanic glass that holds water extremely well. It works wonders to keep humidity levels high. After a good soaking, place the tray of Easy Start pots on top of the perlite layer. Use a pencil or skewer to widen the hole on top of each pot and place a seed of your choice in each one.
3. Finally, add the lid to the propagator to create a dark and moist environment. Your seeds will germinate within the next 1–6 days.
.jpg)
.jpg)

.jpg)
