Mouldy weed: How to identify, avoid, and treat it
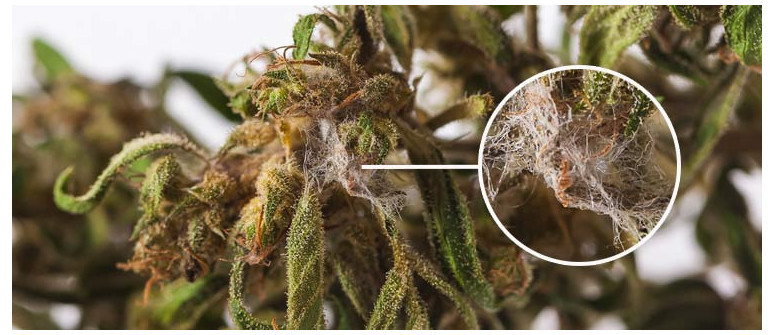
In some cases, mouldy weed can be a bit difficult to identify. This article explains the proper ways to do so to avoid potential health problems. Prevention is easier than you might think!
Contents:
So here’s the situation: you go through your stash box and you’re delighted to find a half-filled ziplock bag. It’s the secret weed you’ve hidden from the family for months, so it feels like you've struck gold.
You open up the bag and the smell of old weed wafts over you. But you pay it no mind, thinking, “How bad can it be?”.
But, upon a much deeper probe, you notice a bit of white, powdery buildup on the surface of your bud. You then hold off on your smoking plans and throw the entire stash away. Smart move.
That, right there, is a classic case of mouldy weed. It’s an unpleasant sight, and it’s in no way good for you. So in this article, we're delving into the types of mould that affect cannabis, what causes them to occur, and how you can avoid a mouldy stash.
What Are the Main Types of Cannabis Mould?
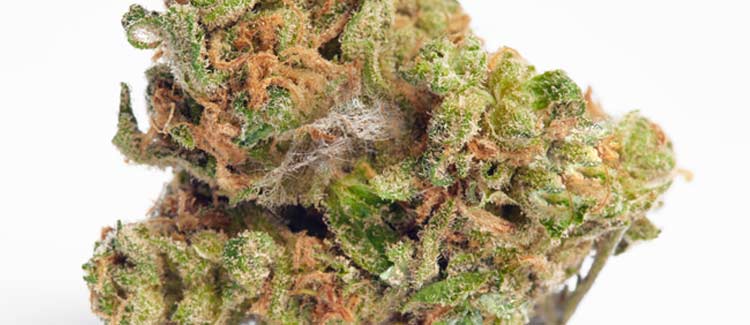
It can be difficult to spot cannabis mould with the naked eye, especially for a rookie. Sometimes you’ll need a magnifying glass to get a better view. But how exactly can you identify mould without knowing what to look for?
Here are the three main types of cannabis mould you could encounter.
White Powdery Mildew
If your plant’s leaves look like they’ve been sprinkled with powdered sugar, you’re likely dealing with mildew.
White powdery mildew (WPM) isn’t that big of a problem unless you turn it into one. Leaving it unattended may cause a full-blown infestation that ravages your buds in the long run. That would be an unfortunate case of wasted herb.
Luckily, white powdery mildew is easy to spot and remove.
Bud Rot
This one’s a harsher case to deal with. And unlike white powdery mildew, bud rot can be a bit tricky to identify.
Dealing with bud rot is more of a challenge because its visual symptoms aren't expressed until after the infection. You’ll only begin to notice the damage once it’s too late.
The most telltale sign of bud rot is discolouration. From an aesthetically pleasant green, infected buds turn dark brown to black. In some cases, you’ll see a purplish hue.
A fully contaminated bud will be enveloped with a dark, thick, dust-like substance. It will also feel mushy upon touching. And when it comes to bud rot, there’s no other recourse but to throw them out.
Mucor
Unlike white powdery mildew, mucor looks more like spiderwebs on your buds. Some may liken it to thin cotton candy strands. Either way, it’s not a good sign.
It’s easy to perceive mucor (the fuzzy white mould) as a harmless little infection, but the reality is the exact opposite. It spreads fast and can easily devastate your crops. That’s a couple of months of hard work down the drain.
How Does Weed Get Mouldy?
Moulds thrive in moist and humid conditions, where they decompose organic matter and absorb nutrients from host plants.
Moulds caused by moisture, on the other hand, mostly occur with plants like cannabis. For cultivators, the most common cases happen while growing outdoors, either late into the season or in a region with heavy summer rainfall.
However, mould can develop in harvested buds as well. Using flimsy containers, for example, will expose them to humidity and cause a buildup of pesky mildew.
Can Weed Get Mouldy in a Mason Jar?
Mason jars are the king of airtight containers. It’s why you’ll commonly see them inside refrigerators and pantries with food and sauces in them.
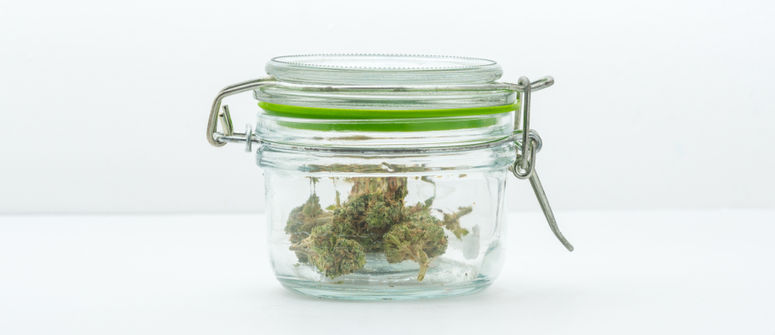
In the case of cannabis storage and curing, mason jars work equally well. However, any trapped moisture can lead to a mouldy situation, even with the most impermeable container.
So before you start storing your herbs, make sure your mason jars are cleaned and properly dried. Not only that but use humidity packs to keep conditions optimal at all times. They’re relatively cheap and will only serve your stash.
How To Check for Mould on Weed
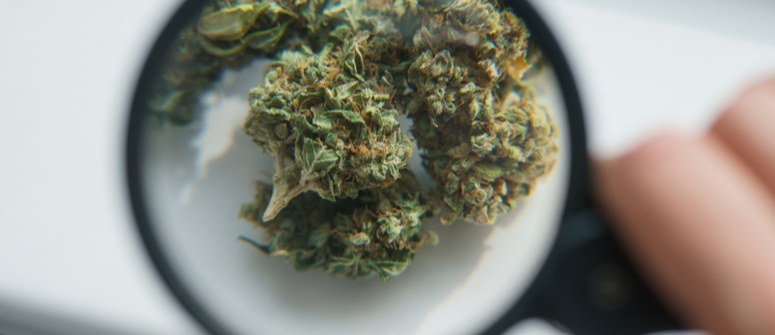
An untrained observer may have some difficulty with this one. If you happen to be in this camp, here are some ways to check for mould on your beloved herbs.
Smell It
The old, trustworthy smell test not only works with food; you can give the same treatment to your herbs. And just like the gut, the nose has a good sense of intuition.
Even if you don’t have the olfactory sensitivity of a more experienced cannabis connoisseur, you’ll know if something smells off. Also, the aroma of fresh weed is very distinguishable, and the difference is immediately noticeable.
However, some moulds don’t always bring out a scent. In that case, you’ll need to revert to another one of your five senses.
Look at It
Your eyes are as reliable as your nose when it comes to identifying mouldy weed. But as we mentioned, you’ll need to know what you’re looking at.
In the previous section, we covered the different types of mould and what they look like. If you see a cotton candy-like buildup on the surface of a bud, then you’re dealing with the run-of-the-mill mucor.
Some moulds may camouflage themselves as kief, but you should also know how to make that distinction. White powdery mildew is much duller in colour and may appear greyish. Moulds look more like matte dust and lack the recognisable sparkle that kief has.
Use Tools To Check for Mould
Now, if you want to take things up a notch, there are some tools to help you out. Apart from a magnifying glass, a low-powered microscope can also get the job done. The good news is they’re relatively affordable.
Under these specialised lenses, moulds appear to have filaments, which helps to distinguish them from trichomes. These devices provide an instant crash course on spotting mould that will only come in handy in the future.
Use a Blacklight
If you’re not an expert and don’t know what to look for, you can easily mistake trichomes for mould. Before you know it, it’s already too late.
So, for the novice observers out there, a blacklight will help you spot mould much easier. Moulds will stand out in a bright green hue once illuminated under a blacklight.
Have It Tested in a Lab
If you want to be dead sure, have your buds tested in a lab. An actual microbiologist will put your beloved herbs under a microscope to examine possible mould buildup. They will look at everything, from how these microbes grow to the environment they thrive in.
The downside here is that it will cost you some money. But what you get in return are accurate findings from licenced professionals.
How To Check for Mould When Buying Weed?
The shorthand method here is to use the indicators previously mentioned. Are you seeing those spider web threads on your buds? Or maybe that white powdery buildup?
Regardless, your best move would be to buy from a reliable source. Try to avoid shady dealers you’d encounter on the street. As much as possible, stick to accredited stores and dispensaries. Licenced retailers should never sell you mouldy weed. If they do, it’s cause for alarm (and time to alert the regulatory authorities).
How To Get Rid of Mould on Weed
Unfortunately, a lot of cannabis users around the world don’t have access to dispensaries, coffeeshops, or quality cannabis clubs. In this case, mouldy weed is more likely. So for this section, we’ll address the question of how to get rid of the mould on your weed.
Is There a Way To Remove Mould From Weed?
Cannabis forums will give you suggestions that may inspire some hope. Some suggest cutting off the mouldy part and keeping the "uncontaminated" buds for future enjoyment.
Others will have you submerging your mouldy buds into a jar filled with water and storing it in a cool, dark place for at least 24 hours.
These aren’t really advisable, nor are other suggestions. If one part of your bud has developed mould, there’s a good chance the rest has been contaminated to some degree. Short answer—no.
Can Mouldy Weed Be Saved?
Even if some random person on the internet provides some sort of pseudoscientific solution, it’s better not to risk it. Technically, yes, mouldy weed can be saved—but is it worth it?
Are you willing to put your health on the line for momentary pleasure?
How To Prevent Mouldy Weed
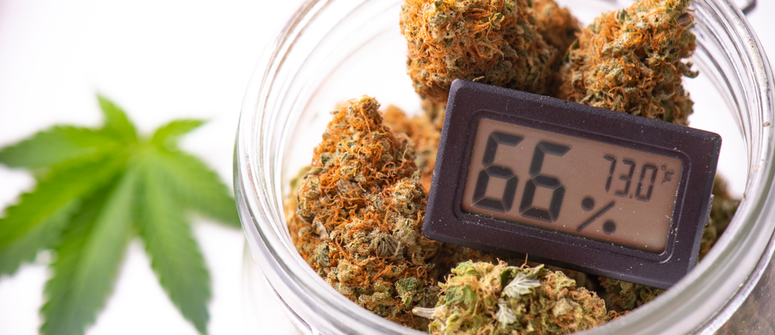
Prevention is indeed better than a cure, and that also applies to cannabis buds. Since no remedy works for mouldy weed, here are some ways you can prevent it from happening.
Dry and Cure Properly
We mentioned in an earlier section that moisture is mould's primary feeder. If you’re growing your own crops, the problem may lie in your drying and curing process.
When drying, you want your room to be at a moderate 15–21°C (60–70°F). Humidity levels should not exceed 55%. And to know whether or not you’re at the right percentage, an affordable thermo-hygrometer will help you out.
As for the drying time, shoot for 3–7 days. But another good way to gauge progress is to bend the stems. If they snap, they’re good to go. If they bend, there’s still too much moisture.
For curing, store the dried buds in airtight glass containers, like mason jars. This not only prevents moisture from entering but also helps preserve the flavour. Allow this process to take place for 2–8 weeks. During this time, “burp” the jars (open them for a few minutes each day) to allow for fresh air exchange. Relative humidity within the jars should never exceed 65%, though 62% is optimal.
Store in a Cool and Dry Place
Too much heat leads to humidity and moisture, which fast-tracks the growth of mould. So for storage purposes, you want your buds to be somewhere cool and dry.
Avoid stashing in places where it can be exposed to excessive heat, like cupboards above the stove. You also want your buds to be somewhere dark because too much light can degrade the active compounds within.
Use an Airtight Storage Container
We mentioned earlier that mason jars are the ideal storage containers for buds. They do a swell job of keeping the moisture out.
The problem with keeping your herbs in plastic ziplock baggies is that they don’t seal well, and the plastic itself is porous. Too much moisture escapes and your buds end up dry and devoid of flavour and aroma.
You can use old jam jars if you don’t want to spend money on true mason jars. Or, you can go with Sneakguard lockable storage to really cover all your bases.
Maintain Precise Humidity Levels
Although too much humidity is a true bud-killer, you don’t want them to dry out either. Aim for 60–62% RH in your jars to keep buds fresh and viable. Don’t know how to maintain this optimal moisture window? Use humidity packs! As mentioned above, they’re easy to source and take a lot of the pressure off.
Should You Smoke Mouldy Weed?

The answer is a definite NO. Here’s a list of reasons to stay away from smoking mouldy weed:
• Asthma and lung irritation
• Compromised immune system
• Allergic reactions like sinus pain and congestion
• Coughing
• Nausea and vomiting
Is Mouldy Weed Toxic?
We’ve provided the possible adverse reactions, but let’s delve into the long-term health risks. If worst came to worst, these cases could turn fatal.
According to a 2017 study, the most common mould bacteria found in cannabis are Aspergillus and Cryptococcus. Exposure to Aspergillus could cause lung infections, while ingesting Cryptococcus may weaken the immune system.
Mouldy Weed: Can Cannabis Expire?
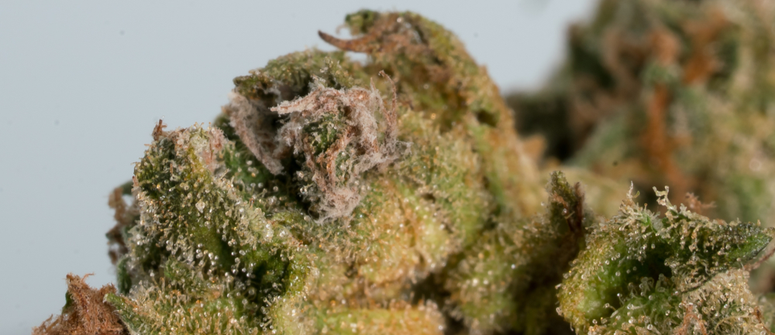
If improperly stored, weed can go bad quickly. Too much exposure to sunlight can cause your buds to turn bone-dry, while excessive moisture will lead to a mould problem you can very much avoid.
Trying to save a mouldy stash is never advisable, so prevention will be your best bet. Be sure to store your buds in airtight glass containers in a cool, dry, and dark place.
Ultimately, remember to keep in mind everything we shared in this article. Do that, and mouldy weed won’t be part of your problems.
.jpg)
.jpg)

.jpg)
