How to start growing weed indoors in 10 easy steps
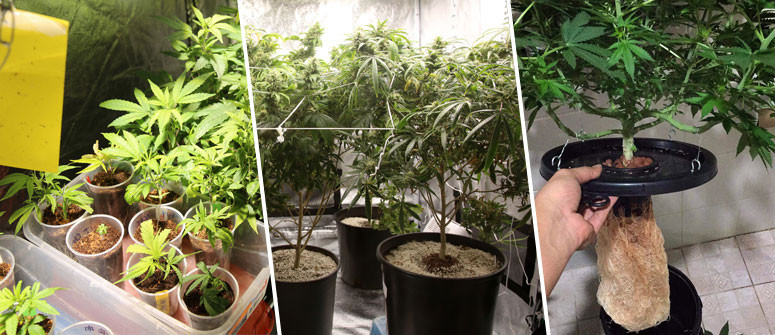
Growing weed indoors can be daunting. But it doesn't need to be. Click here for 10 simple steps to start growing weed indoors today.
If you use weed either recreationally or medicinally, chances are you’ve thought about growing your own. Luckily, growing weed indoors isn’t as hard as it's often made out to be. Here are 10 easy steps to start growing weed indoors today:
1. FIND A GROW SPACE
The first step to growing weed indoors is finding a good grow space. And while first-time growers often imagine they need a lot of space to support their plants, that’s actually not entirely true.
In fact, you’ll be surprised to learn that you can grow great weed almost anywhere, including in closets, garages, basements, and spare rooms.
Obviously, a bigger space is ideal, allowing you to space your plants out nicely and work more comfortably. But keep in mind that larger spaces also require more lighting and ventilation, which also increases costs.
When picking your indoor grow space, remember to keep the following things in mind:
- Cannabis plants have strict light requirements. Your plants will need strict dark periods, during which no outside light should enter the grow space and disturb your plants. This can cause stress and affect plant health and yields.
- Temperature/humidity: Temperature and humidity are extremely important factors to consider when growing cannabis. You’ll want to grow in a space where you have as much control as possible over temperature and humidity levels in order to maximize the potential of your plant/s.
- Cannabis plants need plenty of airflow. Air circulation helps keep temperature and humidity levels steady throughout your grow room. Poor air circulation can lead to a lot of problems for your plants and puts them at risk of mould and other diseases.
2. INSTALL REFLECTIVE WALLING
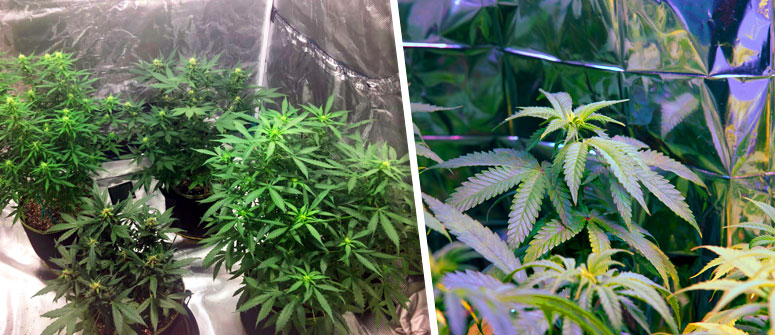
Once you’ve found the right grow space you’ll want to start preparing it for your plants. The first step to doing so is installing reflective walls.
Reflective walls help direct as much light as possible onto your plants, resulting in big, potent yields of delicious buds. This essentially allows you to increase the power of your lights without driving up your electricity costs.
In fact, reflective walls can increase the power of your lights by up to 30%. Best of all, installing reflective walls is actually really simple.
There are a few options for installing reflective walls in your grow space:
- Grow tents: Grow tents are a very popular option among indoor growers. They feature reflective walls which are specially designed to deal with cannabis grow lamps. This means they won’t melt due to the heat of your grow lights and offer the best levels of reflectivity out of all the options listed here. Grow tents are also very easy to set up and usually come complete with everything you need to create a great harvest. Just look out for any bubbles or pockets forming in the tent walls, as these will bring down the reflectivity in your space.
- Flat white latex paint: Flat white latex paint is available at all paint shops and offers great reflectivity (between 85-95%). It is also really easy to apply and doesn’t create pockets or bubbles (like grow tent walls) which can lower the reflectivity in your grow space.
- Panda plastic: Panda plastic is a kind of plastic which you can easily install along the walls of your grow room using nails or velcro. It also offers great reflectivity levels similar to those of flat white latex paint (85-95%). Panda plastic, however, can get expensive, especially if you need a lot of it. Plus, the plastic can also melt should it get too hot from your grow lights. Like with grow tent walls, you’ll want to avoid the plastic forming bubbles or pockets.
3. DEAL WITH LIGHT LEAKS
Remember that cannabis plants are very sensitive to light, especially during their dark periods. Any light that enters your grow space during your dark periods can upset the rhythm of your plants and cause stress.
Growers often debate how much light leaks affect plants. Some argue that even the smallest leaks can unnecessarily stress your plants, while others think the issue is slightly exaggerated.
We tend to believe the former and always advise new growers to take the extra time to test for light leaks in their grow room.
Light leaks can ultimately stunt plant growth and affect both the size and quality of your harvests. In some cases, light leaks can also cause hermaphroditism.
Testing for light leaks is easy. If you’re growing in a room, simply turn on your lights, stand outside the room, and look for small rays of light leaking out of it. After all, if light leaks out of your room, you can be sure it’ll also leak in.
Then, do the reverse; stand inside your dark grow room and look for any light leaking in. You’ll usually find light leaks around doors and windows.
If you’re growing inside a tent, closet, or any other space that you can’t physically fit into, do the test from outside the grow space, looking for any light rays leaking out of the space from your grow light.
Should you find any leaks be sure to cover them. The way you do so will vary on the size and place of the leak. Some common options include:
- Blackout tape. This stuff is inexpensive and can easily be installed on small leaks around the cracks of doors and windows, as well tears in reflective walls.
- Panda film and plastic. This is great for covering bigger leaks and can be used to cover bigger spaces like entire doors and windows. It is more expensive than blackout tape but also very effective.
4. INSTALL AN AIR FILTER
Unless you’re lucky enough to live in an area where cultivating weed is legal, chances are you’ll want to keep your operation pretty secret. Hence you’ll want to minimize the smell of your plants.
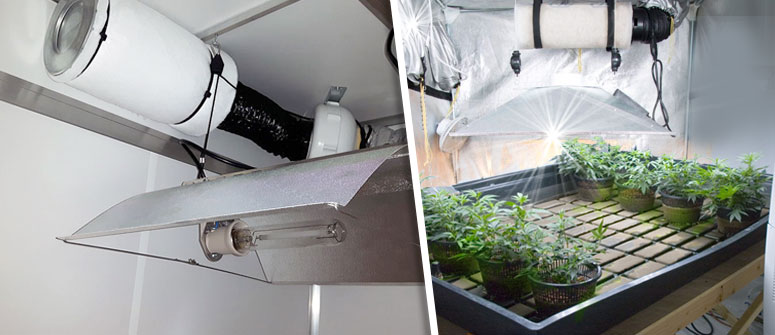
One of the best ways to do this is using an air filter. These filters literally filter the air in your grow space and essentially “scrub” it of any odours.
Most cannabis growers opt for carbon filters or scrubbers. These are the same kind of filters used to filter the smell from car exhausts, so you can rest assured they’ll do a good job at scrubbing the air in your grow room.
The science behind these filters is simple; air passes through the filter, which contains activated carbon that absorb smells and other impurities from the air before pumping it back out.
The most common way to install carbon filters is to attach them to your exhaust system (outlined below). That way, hot air from inside your grow room is pulled through the filter and purified before being passed outside.
If you’re only growing 1 or 2 plants, you’ll probably be able to cover the smell in your grow space without using a filter. However, any medium-to-large grow room should use a high-quality filter and exhaust system to avoid attracting any unwanted attention.
5. INSTALL A VENTILATION SYSTEM
At the beginning of this article we mentioned the importance of air circulation for cannabis plants. Installing a quality ventilation system is the best way to ensure your plants get plenty of fresh air all throughout their grow cycle.
In nature, cannabis plants thrive in a gentle breeze. This protects the plants against mold, bud rot, and white powdery mildew, as well as pests such as fungus gnats, spider mites, and more.
Moreover, steady air circulation also helps manage heat/humidity around the plants and also wisps away moisture after weather events like rain. Finally, soft winds also help plants develop strong branches and stems as they bend and sway in the breeze.
When growing cannabis indoors, your plants won’t have to deal with rain. However, they’ll still be susceptible to many of the same pests and diseases as outdoor plants. Hence, you’ll want to install a quality ventilation system to provide your plants with just the right amount of air circulation.
The easiest way to increase air circulation in your indoor grow room is using fans. Most growers will strategically place a few wall fans along their grow space to create a gentle, yet steady breeze throughout the entire canopy of their plants.
To help manage heat and humidity inside a grow space, most growers will also install exhaust systems designed to pull hot, old air from the grow space and make room for fresh air.
Most growers will install their exhaust fan above their growl light, where hot air usually accumulates. Then, they’ll usually use a few regular fans to keep air moving throughout the entire space.
Here are some tips for installing fans and exhaust systems in your indoor grow space:
- Don’t point strong fans directly at plants. Instead, aim to create a steady flow of air through the canopy..
- Check out all areas of your grow space after installing fans to make sure air moves throughout the entire room/area.
- Remember, strong winds can cause windburn and stress your plants. Stick to a gentle, yet steady breeze.
6. INSTALL A GROW LIGHT
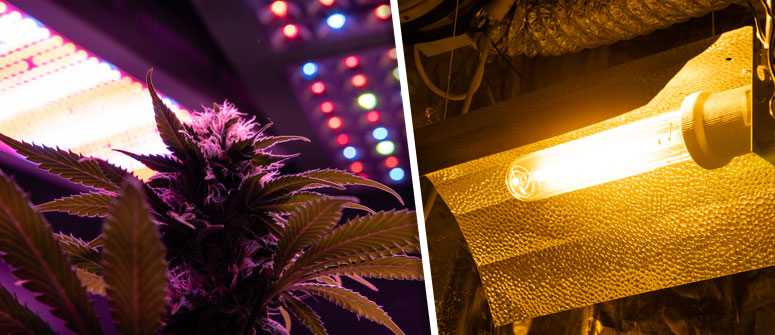
A grow light is the center of an indoor grow operation. After all, cannabis plants need plenty of light to grow and produce delicious buds.
Grow lights should be installed so as to cover as much of your plants as possible. You’ll probably want to experiment with the positioning of your plants to ensure all of them get good light coverage.
Remember that grow lights can get hot and should be kept away from any possibly flammable material.
There are hundreds of grow lights available to you. Choosing the right one really depends on the size of your grow room, your experience with cannabis, and your budget.
Here are some of the most popular lighting options used to grow weed indoors:
- Compact fluorescent lights (CFLs): These are probably the most popular lighting option among beginner growers. They are fairly inexpensive, but lack the power of professional grow lights like those mentioned below.
- Fluorescent Lighting (T5 / T8): T5 and T8 flourescent lights are typically designed to be used with plants that require lower light intensities than cannabis. Hence, they usually need to be installed very close to the plant tops to be efficient. Nonetheless, some growers still get good results using these lamps.
- LED grow lights: LED lighting is much more expensive than the fluorescent options we mentioned above. However, they are also much more powerful and can provide your plants with a lot of light as long as you use them properly. If you decide to go down the LED route, remember to research your specific light model to make sure you install it properly.
- Metal Halide (MH) and High Pressure Sodium (HPS): These are the best grow lights for cannabis. They are very powerful, relatively cheap, and especially easy to set up. Most indoor growers opt for either Metal Halide or High Pressure Sodium lights.
7. SET UP YOUR ACCESSORIES
Above we’ve covered most of the larger pieces of equipment you’ll need to install in your grow room. Once you’ve got all this organized, it's time to source and install all your smaller pieces of equipment and accessories.
Here’s a list of some of the extra equipment you’ll need for your indoor grow space:
- Pots. Sizes depend on how big you want your plants to get.
- Ph meter. Used to measure Ph levels of your soil and ensure a good environment for your plants.
- Thermometer/hygrometer. Used to measure temperature and humidity levels in your grow room.
- Soil/grow medium. There are various different grow mediums that can hold cannabis plants. Choosing the right one depends on your skills as a grower and preferences.
- Shears. Used to prune plants.
- Mister. Used to apply pesticides.
- Buckets.
- Nutrients and fertilizers. Used to feed your plants.
- Timers. Used to automatically control your grow lights.
8. BRING IN YOUR PLANTS
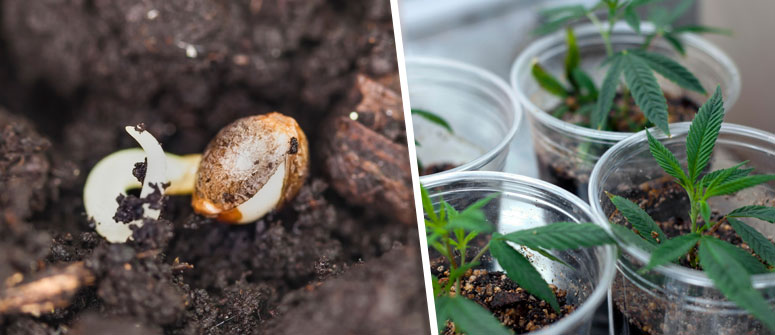
Follow the last 7 steps and you’ll have a decent grow room. Now all you’ll need is some some plants to get you started!
Start by selecting which strain to grow. There are thousands of strains out there, each with their own advantages and disadvantages. Which one you choose to grow is completely up to you. Most importantly, grow a strain that you’ll enjoy smoking but is still suited to your experience and grow room. You can learn more about different cannabis strains using our strain database.
Once you’ve chosen a strain, it's time to bring in your plants. There are a few ways you can do this, including:
- Growing straight from the seed. This is very common, but means you’ll need to know how to germinate seeds properly. If you do, we recommend using feminized seeds to avoid having to deal with males (unless you plan on breeding).
- Using cuttings. Some growers choose to buy cuttings to avoid having to germinate their own seeds. If you choose to do so, remember to source your cuttings from a reliable source.
9. BE PATIENT AND LOVING!
Once you’ve brought in your seedlings/cuttings, it's time to be patient. Growing great weed takes time, and you’ll want to pay close attention to the needs of your plants.
Cannabis plants have 2 distinct growth phases. The vegetative phase is characterized by vigorous vegetative growth, through which the plants develop “bud sites.” Then, after roughly 4 weeks, your plants will move into the flowering phase, during which they’ll turn their focus to developing big, beautiful buds.
The exact details of growing cannabis vary depending on the strain you decided to grow as well as the specific phenotypes you’re working with. The most important thing is to just pay close attention to your plants and regularly read our grow articles for tips on training, nutrition, pruning, and much more.
10. HARVEST
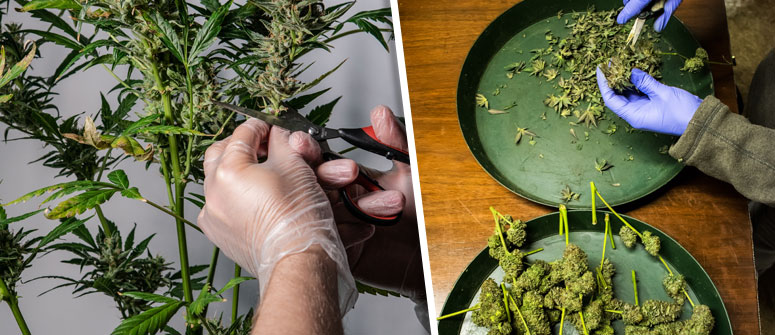
Somewhere after 6 to 12 weeks, your plants will usually be ready for harvesting.
First you’ll notice that your buds will stop developing white hairs. Your plants should also be very fragrant, and their buds should look very plump.
Next, you’ll notice the white pistils slowly darkening, usually turning slightly red or orange. These hairs will also begin curling inwards as the buds mature.
You’ll want to wait until at least 40% of the pistils on your buds have started darkening. This marks the beginning of the harvest window. Buds harvested at this time will usually produce a more uplifting effect and will be slightly less potent.
Some growers may wait out the harvest period a little longer until 50%-70% of the pistils have darkened. This is said to be time when THC levels in the buds are at their highest. Buds harvested after this time will produce more relaxing effects.
Once you’ve harvested your buds, it's time to trim and dry them. This can take up to 2 weeks. You’ll want to dry your buds slowly by hanging them upside down and store them in quality, sealed glass jars once they’re done.
Then, once you’ve harvested and cured your buds, it's time to kick back, light up, and enjoy the fruit of your labour!
Remember, the info here is generalized and is designed to serve as a basic introduction to the different necessary steps of growing weed. Make sure to regularly check out our blog for more detailed articles about the various aspects of growing weed indoors.
.jpg)
.jpg)

.jpg)
